Basic Setup
Setup of StencilWorks is incredibly simple!
-
Simply open the project settings and find the StencilWorks Category.
-
Configure the settings for each buffer you want upscaled.
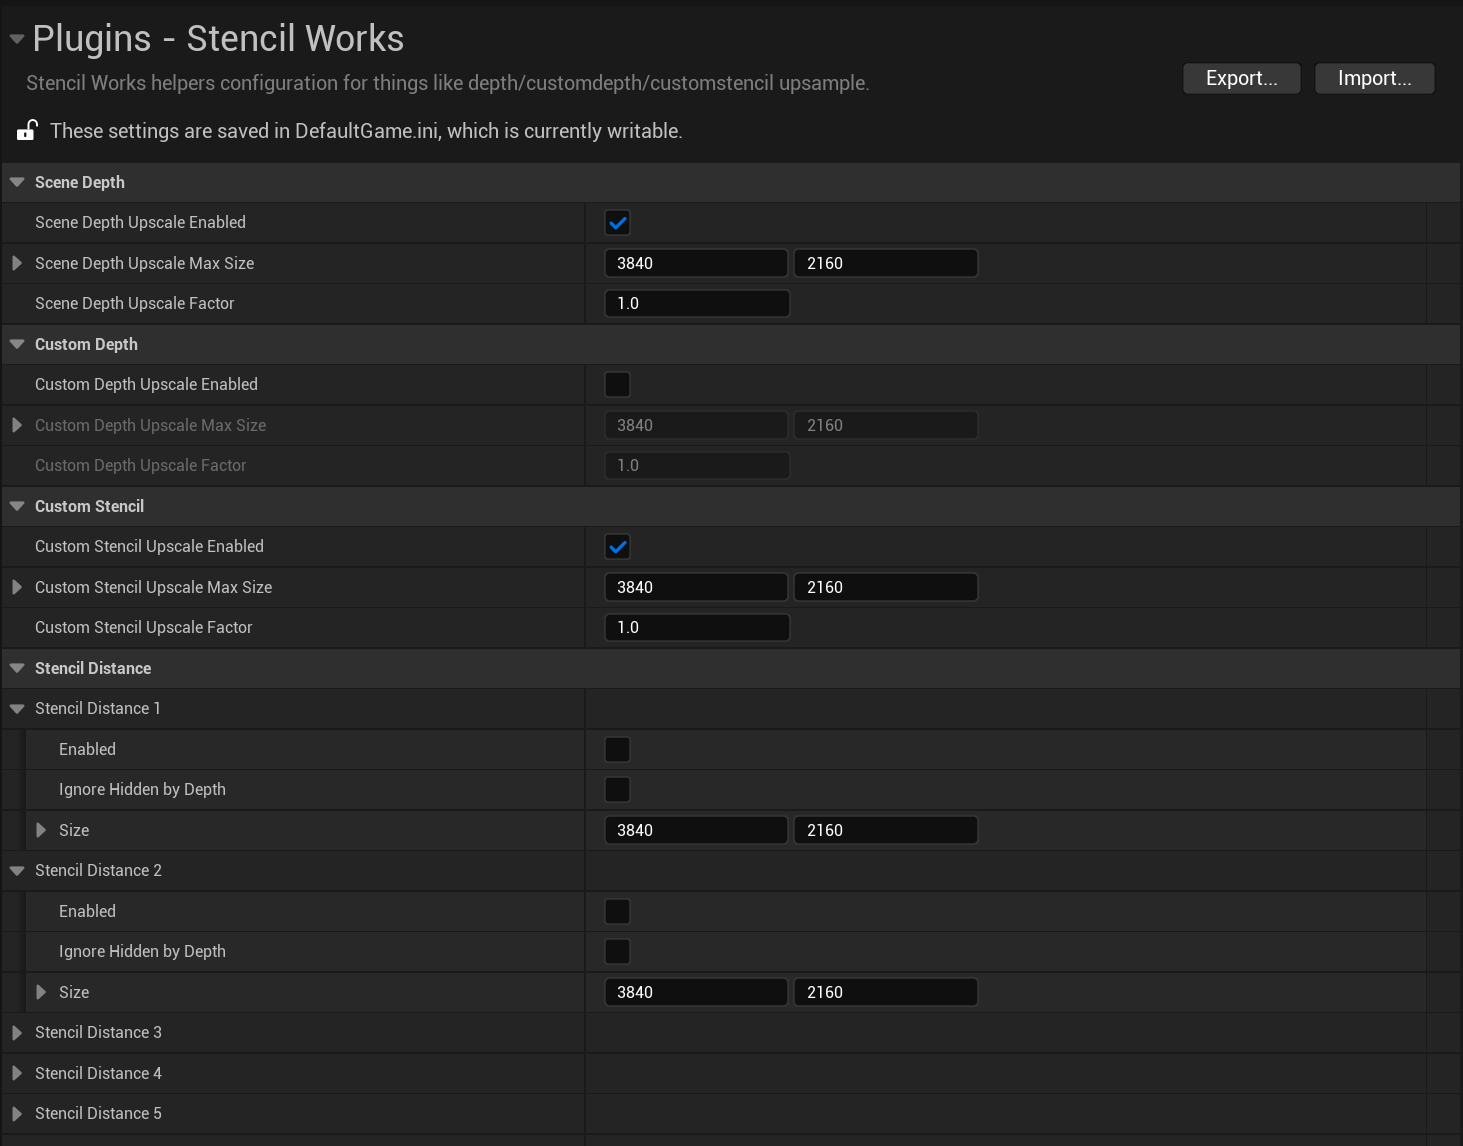
Enabled: Turn on/off upscaling of the bufferMax Size: controls the maximum size the buffer is able to upscale to, and is the backing texture size.Upscale Factor: controls the percentage of the SecondaryView size you want to upscale too. 1.0 matches TSRs output size up to the max size.Ignore Hidden by Depth: Is CustomStencil only, but it controls whether other objects in scene depth block the stencil bits so it only looks at what’s visible.
-
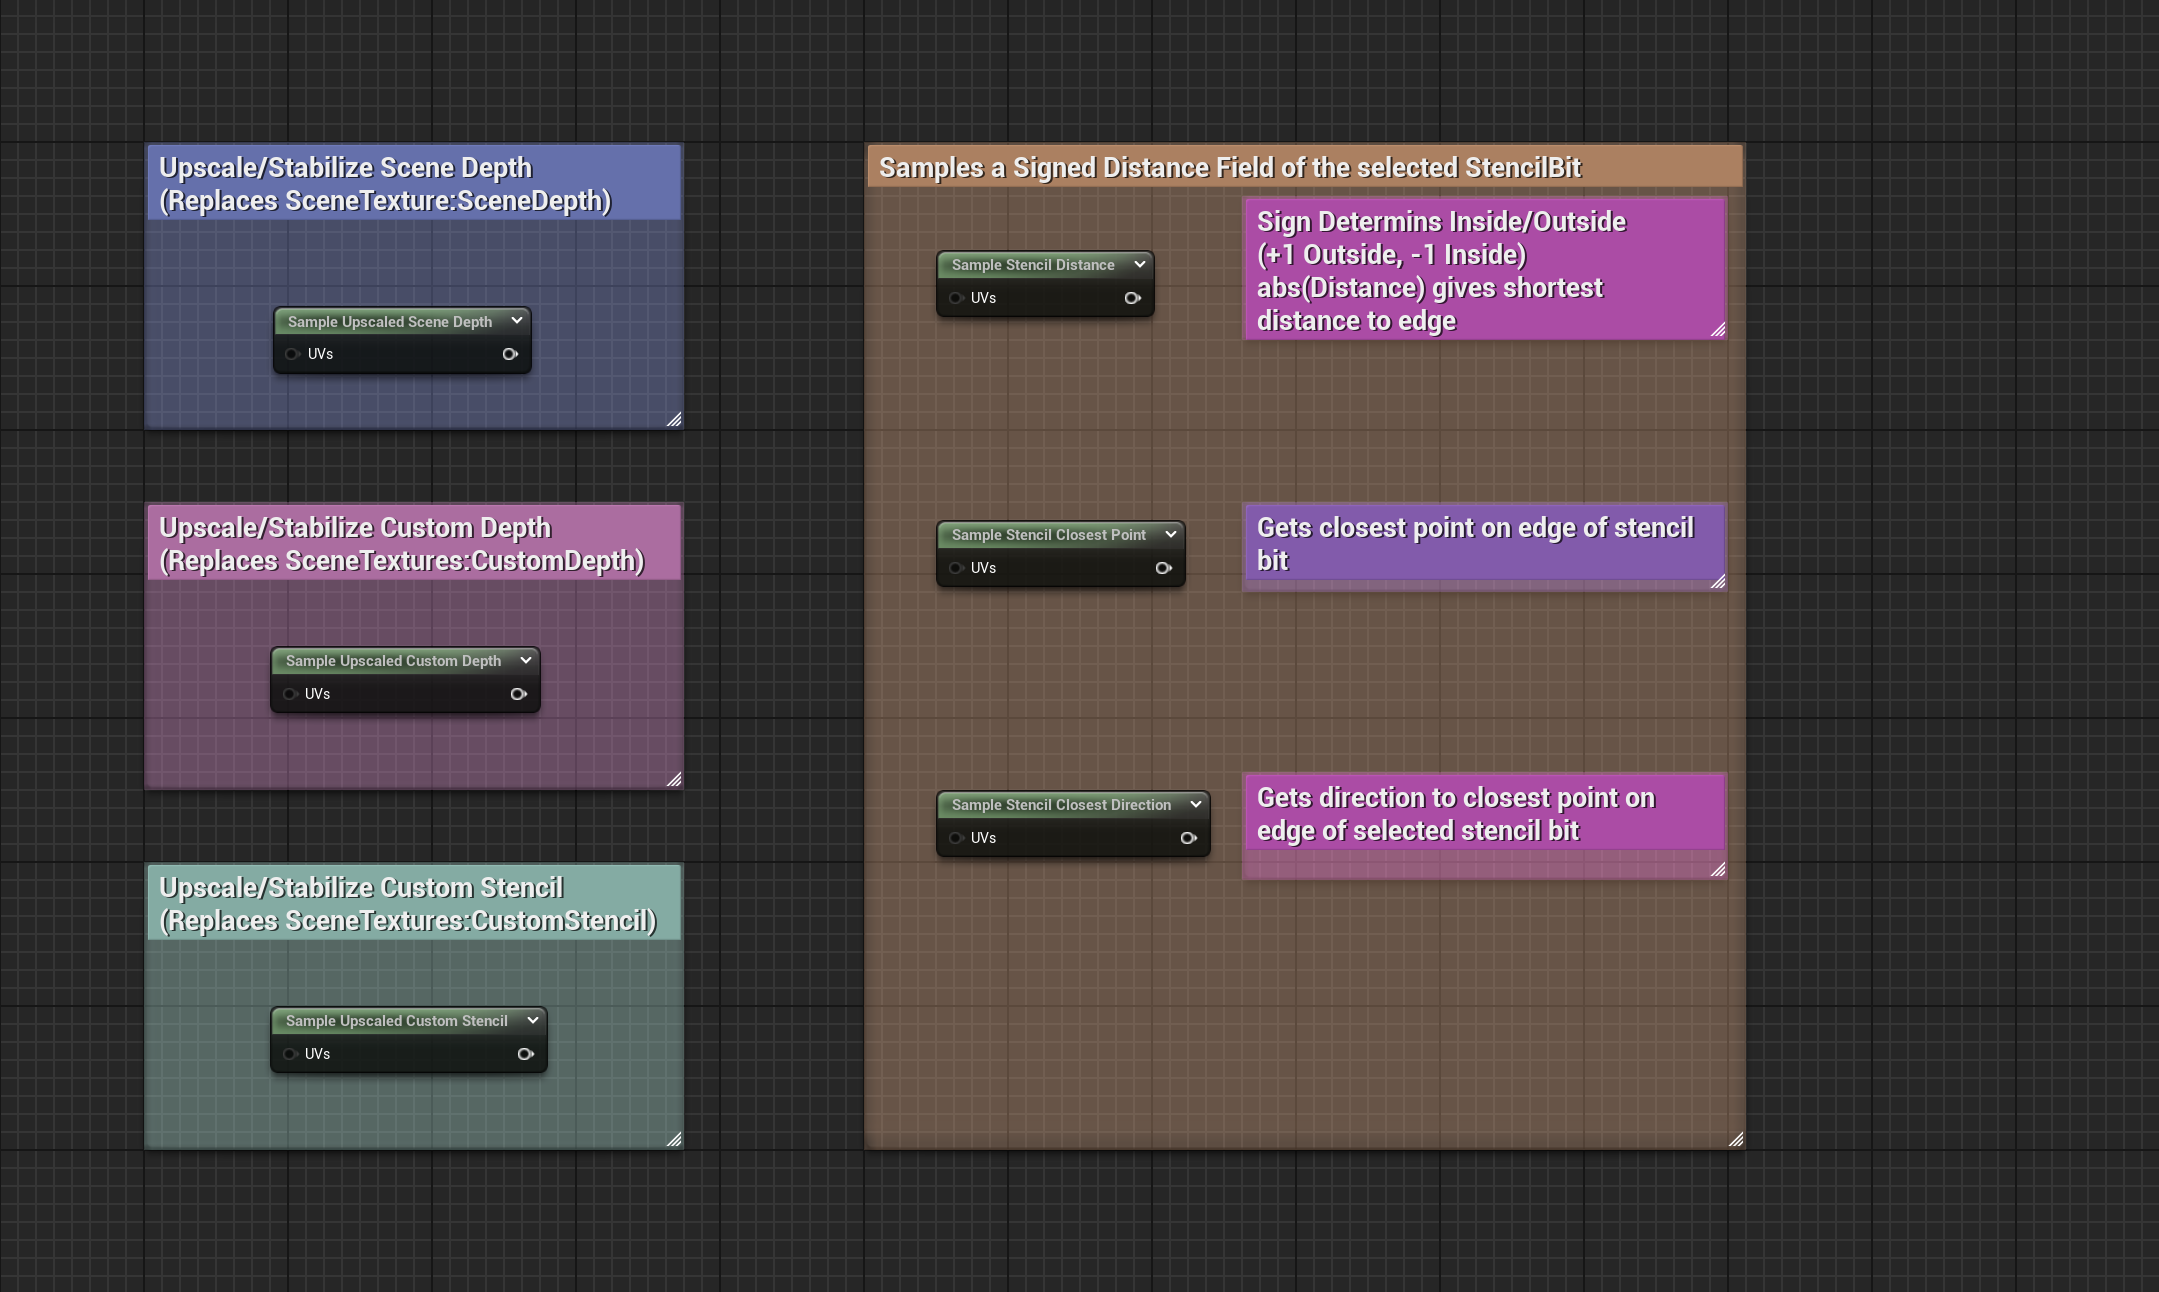
Use the Upscaled Sample Nodes to sample SceneDepth/CustomDepth/CustomStencil as direct replacements to engine provided nodes. For Custom Stencil you can use the Distance,ClosestPoint, or Direction sample nodes all of which can be seen below.
-
There are basic examples of the usage of the buffer upscaling as well as a basic usage of stencil distance in the plugin content. These are all post process materials and can simply be dropped on a post process volume like other post process materials.
StencilWorksDemo_SceneDepth: Shows a debug view like SceneDepth debug visualizer using the upscaled scene depth.StencilWorksDemo_CustomDepth: Shows a debug view like CustomDepth debug visualizer using the upscaled custom depth.StencilWorksDemo_CustomStencil: Shows a debug view like CustomStencil debug visualizer using the upscaled custom stencil.StencilWorksDemo_StencilDistance: Shows a debug view of CustomStencil Bit 1 as a Signed Distance Field render.